Get in touch
555-555-5555
mymail@mailservice.com

Blogs
By Alejandro Cortes
•
December 6, 2024
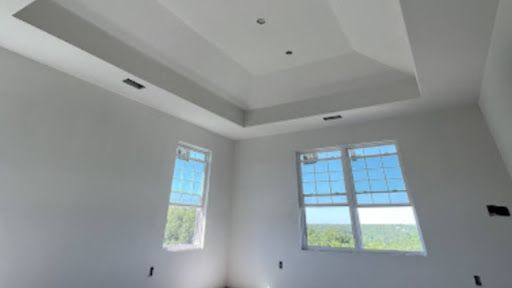
To repair drywall, clean the area, and fill small holes with spackle, sand, and paint. For medium holes, cut a patch, secure it with furring strips, tape edges, apply joint compound, sand, and paint. For large holes, install backing support, attach a drywall patch, tape, compound, sand, and paint. For cracks, widen them, fill them with spackle and sand, and touch them up with paint. Always ensure safety and proper tools for the best results. Drywall repair is a skill every homeowner should master. Whether it’s a small dent from moving furniture or a large hole from accidental impact, understanding how to fix drywall can save you time and money. With the right tools and methods, even the most intimidating drywall issues can be resolved effectively. At Superior Drywall & Finishing, we pride ourselves on offering expert drywall installation, repair, and finishing services across Northwest Arkansas, ensuring every project meets the highest standards. Key Takeaways Essential Tools: Utility knife, putty knife, sandpaper, joint compound, drywall tape, and more. Step-by-Step Repair: Techniques vary based on damage size, from filling small holes to patching large sections. Additional Tips: Always wear protective gear and consider matching wall textures for a seamless look. Professional Assistance: For complex repairs, consider hiring experts like Superior Drywall & Finishing. Drywall Repair: Step By Step Guide Essential Tools Repairing drywall effectively starts with the right tools. Having these on hand ensures your project is smoother and more efficient: Utility Knife: For cutting and trimming drywall. Putty Knife: Ideal for applying and smoothing joint compound or spackle. Sandpaper: 120-grit for smoothing repaired areas. Joint Compound: Essential for filling gaps and creating a seamless finish. Drywall Tape: Strengthens seams and prevents cracking. Additional Supplies: Dust mask, damp rag, and furring strips for larger holes. Step-by-Step Repair Fixing drywall varies based on damage size. Following the appropriate method ensures a professional finish: Small Holes/Dents: Clean the area, apply spackle, let dry, sand, and paint. Medium Holes (up to 6 inches): Cut patch, install support, secure patch, tape, compound, sand, and paint. Large Holes (over 6 inches): Remove damaged drywall, install backing, secure new drywall, tape seams, apply compound, sand, and paint. Cracks: Widen crack, fill with spackle, smooth, sand, and paint. Additional Tips Repairing drywall requires careful planning and attention to detail. Following these tips can help you achieve better results: Protective Gear: Use gloves, goggles, and a dust mask to stay safe. Check Behind Walls: Always inspect for electrical wiring or plumbing before cutting. Blend Textures: Use texture spray or brushes to match existing wall textures after repairs. Let It Dry: Ensure all compounds are fully dry before sanding or painting. Professional Assistance Some drywall repairs can be challenging or time-intensive. For the best results, consider hiring professionals: Expertise: Skilled in repairing all sizes of drywall damage. Efficiency: Professionals complete the job quickly and accurately. Seamless Results: Ensure repaired areas are indistinguishable from the rest of the wall. Contact Superior Drywall & Finishing: Serving Northwest Arkansas with 15+ years of experience, we guarantee quality craftsmanship and customer satisfaction. How to Choose the Right Drywall for Your Home Selecting the right drywall is essential for durability and functionality. Factors such as location, moisture exposure, and fire resistance influence the best choice. Consider these options to match your needs and enhance your home's interior: Standard Drywall: Ideal for general wall and ceiling applications. Moisture-Resistant Drywall: Perfect for bathrooms, kitchens, and basements to prevent mold and mildew. Fire-Rated Drywall: Best for areas needing additional fire protection, like garages and utility rooms. Soundproof Drywall: Reduces noise transmission between rooms, great for home offices or bedrooms. Impact-Resistant Drywall: Durable option for high-traffic areas or kids’ playrooms. Common Mistakes to Avoid in Drywall Repair Drywall repair can be straightforward, but common errors may compromise the final result. Avoid these pitfalls to ensure a seamless and professional-looking repair: Over-Sanding: Can damage surrounding drywall and require more repairs. Uneven Patching: Results in visible bumps or ridges after painting. Ignoring Texture Matching: Failing to blend repaired sections with the original wall texture makes repairs stand out. Rushing Drying Times: The joint compound needs to dry fully before sanding or adding layers. Skipping Safety Gear: Always wear gloves, goggles, and a dust mask to protect yourself. Frequently Asked Questions About Drywall Repair How long does it take to repair drywall? Drywall repair can take a few hours to a few days, depending on the damage size and drying times for spackling paste or joint compound. What causes drywall to crack or damage? Common causes include structural settling, water damage, or accidental impact. Addressing the root cause is essential to prevent recurrence. Contact Us for Drywall Repair in Bentonville Arkansas Superior Drywall & Finishing is your trusted partner for all drywall needs in Bentonville, Arkansas. With over 15 years of experience, we ensure precision and quality in every project. From minor repairs to complete installations, our team guarantees satisfaction and durability. Contact us today for professional drywall solutions that stand the test of time!
By Alejandro Cortes
•
November 18, 2024
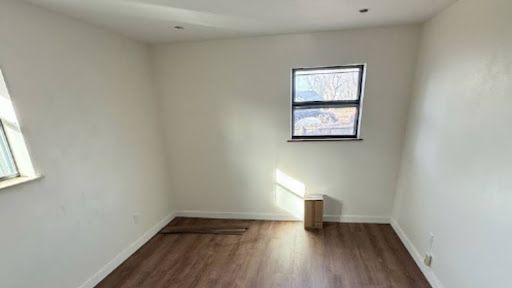
To install drywall, start by measuring the area and cutting the drywall to size. Install ceiling panels first, securing them with screws, then hang wall panels from top to bottom. Cut out spaces for electrical fixtures and trim around doors and windows. Install corner bead for outside corners and finish by taping and mudding the joints. Sand, prime, and paint the surface once the joint compound is dry for a smooth finish. Installing drywall is an essential part of completing walls and ceilings during home renovation or construction. Whether you're tackling a DIY project or hiring a professional, understanding the basics of drywall installation can help ensure a smooth and efficient process. This guide breaks down the steps, materials, and tools you’ll need to get the job done right. If you're looking for expert help with drywall installation, repair, or finishing, Superior Drywall & Finishing is your go-to drywall contractor in Northwest Arkansas, bringing over 15 years of experience to every project. Key Takeaways Drywall installation involves hanging sheets of drywall on walls and ceilings, followed by taping, mudding, sanding, and painting. You’ll need specific materials such as drywall sheets, joint tape, compound, and tools like a utility knife, screw gun, and drywall lift. The installation should be done carefully with attention to measurement, alignment, and securing the drywall into place. After hanging, joint taping and mudding ensure the seams are blended for a smooth finish. Safety is critical—always wear protective gear when handling drywall. Step-by-Step Guide to Installing Drywall 1. Materials and Tools Needed Before you start installing drywall, it's essential to gather the right materials and tools. Proper preparation ensures that you can work efficiently and achieve a professional finish. Here's a breakdown of what you’ll need for a successful drywall installation: Materials: Drywall sheets (typically 4x8 feet) Drywall screws Joint tape Joint compound (mud) Corner bead (for outside corners) Tools: Tape measure Utility knife Screw gun or drill Drywall lift (optional but helpful) Straight edge or T-square Rasp (for smoothing edges) Level 2. Preparation Preparation is crucial to achieving accurate and smooth drywall installation. Begin by measuring the area where you’ll be installing the drywall and cutting it to fit. Proper measurements and precise cuts ensure a clean, professional finish. Measure the Area: Use a tape measure to check the length and height of the walls and ceilings. Measure multiple points to account for any irregularities in the space. Cut the Drywall: Mark your measurements on the drywall sheets. Use a utility knife to score along the marks, pressing firmly but not cutting all the way through. Snap the sheet along the line and cut through the paper backing to complete the cut. 3. Installation Steps Installing drywall requires careful planning and proper technique. Start by determining the orientation of the drywall, followed by securing the ceiling panels. Once the ceiling is done, move on to the wall panels for a smooth installation. Determine Orientation: Choose between horizontal or vertical installation. Horizontal installation often reduces seams and enhances structural integrity. Install Ceiling Panels First: Lift the first drywall panel into place against the ceiling. Secure it with screws spaced about 12 inches apart, making sure they are slightly recessed below the surface. Hang Wall Panels: Start from the top, aligning the top edge of each panel with the ceiling. Drive screws into each stud, spaced 16 inches apart. Cut Out for Fixtures: Mark the locations for electrical outlets, switches, or other fixtures. Use a rotary tool or drywall saw to cut out these areas once the panels are in place. Trim Around Doors and Windows: Avoid aligning seams with door or window openings. Use a utility knife to trim any excess drywall around these openings after installation. Install Corner Bead: For outside corners, attach corner beads using nails or screws every 10 inches. 4. Finishing Touches Finishing drywall requires attention to detail. Properly taping, mudding, sanding, and painting the joints ensures a smooth, professional appearance. Follow these steps to complete your drywall installation. Tape and Mud Joints: Apply joint tape over the seams where drywall panels meet. Cover the tape with joint compound using a putty knife, feathering out the edges to blend it with the surrounding surface. Sand and Paint: Once the compound is dry, sand the surface smooth. Apply primer and paint to give the walls a clean, finished look. 5. Safety Tips When working with drywall, it's essential to prioritize safety. Protect yourself from dust, debris, and potential accidents by following these safety tips. Always wear safety glasses and a dust mask when cutting and installing drywall. Ensure your workspace is clear of obstacles that could cause accidents. Drywall Repair: Fixing Cracks and Holes Drywall repair is an essential skill for maintaining the quality and appearance of your walls. Whether due to settling, accidents, or natural wear, drywall damage like cracks or holes can often be easily fixed with the right techniques and materials. Repairing Small Cracks and Holes: For small cracks, use joint compound to fill the gaps. Sand smooth once the compound dries for a seamless look. Repairing Larger Holes: For bigger holes, cut out the damaged section. Replace with a new drywall piece, securing it with drywall screws. Tape the seams and apply joint compound to blend it into the surrounding wall. Sanding and Finishing: Sand the patched area once dry for a smooth surface. Apply paint or primer for a flawless finish. The Importance of Professional Drywall Installation While DIY drywall installation can be cost-effective, professional installation ensures top-notch results. Expert drywall contractors have the experience and tools necessary to guarantee a smooth and lasting installation, reducing issues like cracks, poor seams, or uneven surfaces. Benefits of Professional Installation: Expert knowledge and tools for a flawless finish. Reduced risk of uneven surfaces, seams, or cracks. Clean, professional results that save time and effort. Handling the Finishing Touches: Professionals will finish the drywall by mudding, sanding, and painting. Ensures the walls are smooth, even, and visually appealing. Drywall Finishing: Taping, Mud, and Sanding Drywall finishing is crucial for achieving a smooth, polished surface. This process involves applying joint tape, covering seams with mud, and sanding between coats to ensure a flawless, seamless wall ready for painting. Step 1: Apply Joint Tape: Place tape over seams and corners to prevent cracking. Ensure the tape is smooth and firmly adhered to the wall. Step 2: Apply Joint Compound (Mud): Spread a thin layer of joint compound over the taped seams. Feather the edges to ensure the compound blends with the wall. Step 3: Sand Between Coats: Once the compound is dry, sand the surface smooth. Apply additional layers of mud as necessary, sanding in between for a flawless finish. Step 4: Final Sanding and Preparation for Painting: Sand the final coat smooth and remove any dust. Apply primer and paint for a professional, clean look. Tools Needed for Drywall Installation Using the right tools can make all the difference in a successful drywall installation. The proper equipment ensures the drywall fits securely, reduces mistakes, and contributes to a faster and more efficient process. Essential Tools for Drywall Installation: Utility Knife: For cutting drywall sheets to size. Screw Gun or Drill: To secure drywall to studs with screws. Drywall Lift: Helpful for holding drywall in place during installation. Rasp: Used to smooth rough edges after cutting drywall. Level: Ensures drywall is installed straight and properly aligned. Other Helpful Tools: Tape Measure: For accurate measurements. Drywall Saw or Rotary Tool: For cutting out openings for electrical fixtures. Frequently Asked Questions About Drywall Installation How long does drywall installation take? Drywall installation typically takes 1-2 days for a standard room, depending on the size and complexity. Finishing, including mudding and sanding, can take an additional 3-4 days. What is needed for drywall installation? Essential materials include drywall sheets, screws, joint compound, joint tape, and corner bead. Tools include a utility knife, screw gun, drywall lift, tape measure, and rasp. What is the best direction to install drywall? It’s generally best to install drywall horizontally as it minimizes seams, enhances structural integrity, and provides better support. What is the tolerance for drywall installation? Drywall should be installed with screws placed about 12-16 inches apart. Tolerances for uneven seams are minimal, and finishing should ensure smooth, seamless walls. Contact Us For Drywall Installation In Bentonville AR Today! Ready to enhance your home or business with expert drywall installation, repair, or finishing? Superior Drywall & Finishing, with over 15 years of experience, is here to deliver exceptional results. Contact us today to schedule your consultation!
By Alejandro Cortes
•
October 30, 2024
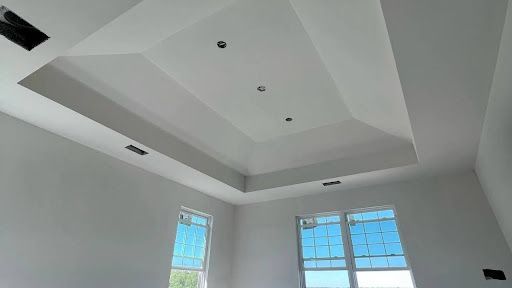
The stages of drywall finishing are categorized into five levels, each serving distinct functional and aesthetic purposes. Level 0 has no finish for temporary structures; Level 1 includes basic taping for areas like attics; Level 2 adds a thin coat over tape and screw holes for utility spaces; Level 3 provides a textured finish for residential appeal; Level 4 offers a smooth surface for painting or wallpaper; and Level 5 is the premium finish with a skim coat for high-end spaces. Each level not only serves practical purposes but also allows for varied aesthetic finishes based on your specific needs. With over 15 years of experience, Superior Drywall & Finishing is dedicated to delivering exceptional drywall installation, finishing, and repair services to both residential and commercial clients throughout Bentonville Arkansas. Our commitment to quality ensures that each drywall project is completed to the highest standards. Key Takeaways Drywall finishing consists of five distinct levels, each with specific purposes. Level 0 is a no-finish stage, mainly for temporary uses. Level 1 provides basic taping for low-visibility areas. Levels 2 and 3 serve as intermediate and textured finishes for utility and aesthetic applications. Levels 4 and 5 are used for smooth and premium finishes, suitable for high-end spaces. Stages of Drywall Finishing In Bentonville AR Drywall finishing is an essential step in both construction and renovation projects, greatly influencing the final look of walls and ceilings. This finishing process is divided into five distinct levels, each catering to varying purposes and aesthetic requirements. Let’s explore each stage in detail: Level 0: No Finish Description: Drywall panels are attached directly to the framing without any finishing. There’s no taping, joint compound, or painting applied. Usage: This level is typically reserved for temporary structures or areas where aesthetics are not a concern, such as construction sites or dust barriers. Level 1: Basic Taping Description: Joint tape is applied to the seams of drywall panels, covered with a thin layer of joint compound. No additional finishing steps are taken. Usage: Ideal for spaces like attics or garages where walls will not be visible or are not subjected to heavy use. Level 2: Intermediate Finish Description: A thin coat of joint compound is applied over the tape and screw holes, providing a more refined look than Level 1 but still unsuitable for painted surfaces. Usage: Commonly used in utility areas, garages, or as a base for tiling in bathrooms and kitchens. Level 3: Textured Finish Description: This stage involves applying an additional coat of joint compound over the taped joints and screws, smoothing out imperfections. The surface can be textured if desired. Usage: Best for walls that will receive heavy textures, such as knockdown finishes, making it suitable for residential spaces requiring a more aesthetically appealing finish. Level 4: Smooth Finish Description: An additional coat of joint compound is applied and sanded to create a smooth surface. This level is often used for walls that will be painted or wallpapered. Usage: Most commonly utilized in residential applications, providing a clean and smooth appearance suitable for various paint types. Level 5: Premium Finish Description: The highest level of drywall finishing, this involves applying a skim coat of joint compound over the entire surface after reaching Level 4. This skim coat results in an ultra-smooth finish that hides any visible imperfections. Usage: Recommended for high-end spaces where glossy or semi-gloss paints will be applied, particularly in areas with harsh lighting that may highlight flaws. The Importance of Drywall Installation Drywall installation is crucial in constructing or renovating any structure. It provides structural integrity while enhancing insulation and soundproofing. Proper installation prevents issues like cracks and sagging, laying a solid foundation for further finishing work. Key Points: Structural Integrity: Supports walls and ceilings, preventing collapse. Insulation: Enhances thermal and sound insulation within spaces. Aesthetic Foundation: Creates a smooth surface for finishing and painting. Expertise Matters: Professionals handle various installation challenges. Cost-Effective: Proper installation minimizes future repairs, saving money. Common Drywall Repair Techniques Drywall repair addresses wear and tear over time. Issues like holes, cracks, and water damage can detract from a space’s overall look. Effective repair techniques begin with assessing the damage to restore the wall's appearance. Common Techniques: Small Holes: Use joint compound for simple patching. Larger Holes: Require drywall patches for a seamless blend. Sanding & Priming: Essential for finishing touches after repairs. Water Damage: Often necessitates complete drywall replacement. Regular Maintenance: Extends the life of drywall, keeping spaces fresh. Understanding Drywall Texture Types The texture of drywall significantly impacts the aesthetic appeal of interiors. Various texture types can transform the look and feel of a room, adding depth and character to walls and ceilings. Texture Types: Knockdown: Rustic appearance for casual settings. Slap Brush: Unique, stylized look for artistic flair. Smooth Finish: Modern and clean, popular in contemporary designs. Light Interaction: Textures affect how light interacts with surfaces. Maintenance: Regular cleaning prevents dust buildup, keeping walls attractive. Choosing the Right Drywall for Your Project Selecting the appropriate drywall is essential for any construction or renovation project. Different types cater to various applications, each offering unique properties suited to specific needs. Key Considerations: Standard Drywall: Adequate for most residential applications. Moisture-Resistant: Prevents mold growth in bathrooms and kitchens. Fire-Rated Drywall: Essential for garages and utility rooms. Soundproof Drywall: Enhances acoustic performance in multi-family homes. Professional Guidance: Consult experts for insights on the best products. The Benefits of Professional Drywall Services Hiring professional drywall services provides numerous benefits, ensuring high-quality and efficient project completion. Experienced contractors handle all aspects of drywall work, delivering aesthetically pleasing results. Benefits: Expertise: Ensures proper alignment, taping, and finishing. Right Tools: Professionals use specialized equipment for efficiency. Cost Savings: Avoid costly mistakes and future repairs. Warranties: Professional work often includes guarantees for quality. Time Efficiency: Faster project completion compared to DIY methods. Frequently Asked Questions About Drywall Do you need to space drywall? Yes, drywall sheets should have a small gap (about 1/8 inch) between them to allow for expansion and to prevent cracking. How messy is drywall installation? Drywall installation can be messy, with dust and debris from cutting and sanding. Professionals use techniques to minimize dust and ensure a cleaner workspace. Does drywall need maintenance? Yes, occasional maintenance like patching small holes, repainting, and cleaning helps keep drywall looking fresh and prolongs its lifespan. Contact Us for Superior Drywall Services in Bentonville AR Today! Need top-notch drywall installation, finishing, or repair? Superior Drywall & Finishing offers exceptional quality with over 15 years of expertise in Bentonville Arkansas. Request an estimate today to see the difference! Contact us today!
By Alejandro Cortes
•
October 18, 2024
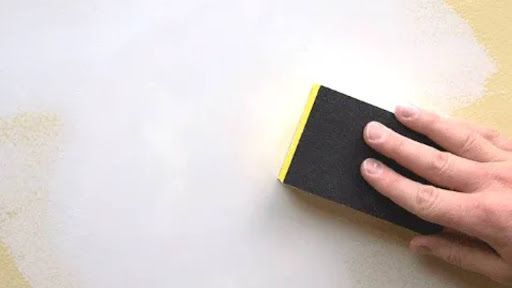
To patch a hole in drywall, clean the area, then apply spackle or joint compound for small holes. For medium holes, cut a drywall patch, attach it, and cover with joint compound. For large holes, create a support frame, attach a patch, and finish with joint compound. Once dry, sand and paint to match the wall. Patching a hole in drywall is a simple task if you approach it methodically. Whether you're dealing with a small dent or a larger break, proper patching ensures your walls look as good as new. Below, we guide you through the steps based on the size of the hole, from small nail holes to large gaps that require extra support. By the end of this guide, you'll be equipped to restore your drywall sheet to its original form, using techniques that make your repair seamless and invisible. At Superior Drywall & Finishing, we take pride in delivering high-quality drywall installation, repair, and finishing services, ensuring your walls are in excellent condition. Key Takeaways: Small holes can be fixed with spackle or joint compound and light sanding. Medium holes require a drywall patch and joint compound for a smooth repair. Large holes need support before patching, and multiple layers of joint compound for a seamless finish. Sanding and feathering edges are key to blending the repair with the rest of the wall. Always match the paint or wall texture after the repair is done. Steps to Patch a Hole in Drywall 1. Small Holes (Under 6 inches) Small holes like nail punctures or minor dings are easy to repair. Steps: Clean the Area: Remove any loose debris or paint flakes around the hole. Apply Spackle or Joint Compound: For very small holes, you can apply lightweight spackle directly into the hole with a putty knife. Spread evenly and smooth it out. Sand the Surface: Once dry, sand the area smooth using fine-grit sandpaper. If needed, apply a second coat of spackle for a perfect finish. Feather the Edges: To blend the patched area with the surrounding drywall, lightly sand the edges of the spackle to make a smooth transition. Paint: After sanding, prime and paint the repaired section to match your wall. 2. Medium Holes (Around 6 inches) For medium holes, like those caused by door handles or minor accidents, you'll need a drywall patch. Steps: Cut a Patch: Take a piece of drywall that's about two inches larger than the hole on all sides. Score and snap off the excess gypsum, leaving the paper backing intact. Prepare the Hole: Cut out the damaged area of the drywall to fit the size of the patch. Attach the Patch: Apply joint compound to the back of the paper patch and press it into place over the hole. Feather out the edges with more joint compound. Sand and Paint: After the patch has dried completely, sand the surface until smooth. Finish with a coat of paint to match the wall. 3. Large Holes (Over 6 inches) For large holes, like those caused by accidents or remodeling, you'll need additional support inside the wall. Steps: Create Support: Cut furring strips or use scrap wood to create a frame inside the wall around the hole. Attach this frame using screws to provide support for the new drywall piece. Cut a Drywall Patch: Measure and cut a piece of drywall that’s slightly larger than the hole. Trace this size onto the wall and cut out the damaged drywall. Attach the Patch: Screw the drywall patch into the support frame. Use joint tape to cover the seams where the new and old drywall meet. Apply Joint Compound: Cover the joints and screws with joint compound, feathering it out smoothly to blend with the wall. Final Touches: After drying, sand the area until smooth and apply paint to match the existing wall. Additional Tips for Patching Drywall: For textured walls, you may need to replicate the texture using a texture spray or brush before painting. Always wear protective gear, including masks and goggles, to avoid inhaling drywall dust. Apply multiple thin layers of joint compound rather than one thick coat for a smoother finish. How to Sand Drywall for a Smooth Finish Sanding drywall is a crucial step to achieving a flawless finish before painting. Using fine-grit sandpaper or a sanding sponge, gently smooth the area where joint compound or spackle was applied. The goal is to blend the patch with the surrounding wall seamlessly, ensuring a professional result. Use fine-grit sandpaper or sanding sponge Sand in circular motions to feather edges Avoid over-sanding to prevent uneven spots Use dust-free sanding tools for a cleaner process Wipe area clean with a damp cloth after sanding Choosing the Right Drywall Patch for Repairs Selecting the appropriate drywall patch is key to an effective repair. The patch type you choose should match the size and severity of the hole. This ensures both a smooth finish and long-lasting durability. For holes under 6 inches, use spackle or pre-made patches For medium holes, use a drywall sheet patch For large holes, use furring strips for support Apply joint compound to secure the patch Ensure the patch matches the thickness of the surrounding drywall Drywall Repair vs. Drywall Replacement When faced with drywall damage, choosing between repair and replacement depends on the size and cause of the issue. Repairing is quicker for minor damage, but larger or more extensive problems may require replacing an entire drywall sheet. Repair small to medium holes with patches Replace drywall with widespread water damage or large cracks Repairing saves time and money for minor issues Replacement is ideal for significant structural damage Consult professionals for extensive drywall damage The Importance of Drywall Installation in Home Construction Proper drywall installation is essential for the durability and longevity of your interior walls. It creates a smooth surface for painting and prevents issues like cracks or misalignment over time, ensuring both functional and aesthetic quality. Provides the framework for interior walls Ensures wall durability and longevity Prevents issues like cracking or sagging Essential for smooth painting and texturing Professional installation ensures a higher-quality finish Frequently Asked Questions About Drywall Repair How long does drywall repair take? Drywall repair can take anywhere from 1 to 3 days, depending on the size of the hole and the drying time needed for spackle or joint compound. Small repairs may be completed within a few hours, while larger patches require more time for sanding and finishing. What is involved in drywall repair? Drywall repair involves cleaning the damaged area, applying spackle or joint compound, sanding the surface smooth, and repainting to blend with the surrounding wall. Larger holes may require patching with new drywall or support structures. How to do a good drywall repair? To ensure a good drywall repair, use the right patching method for the hole size, apply multiple thin layers of joint compound, feather the edges, and sand smoothly before painting. Taking your time and ensuring proper blending will lead to professional results. How often should I replace drywall? Drywall typically lasts for decades but should be replaced if damaged by water, mold, or severe cracks. If you notice structural issues or large areas of damage, it's time to consider replacing the drywall. What happens if you don't repair drywall? If drywall is not repaired, it can lead to more significant issues like worsening cracks, moisture damage, or mold growth. Unaddressed damage may also decrease the aesthetic appeal and value of your home. Contact Us For Drywall Repair in Bentonville, Arkansas Today! Need expert drywall repair services in Bentonville, Arkansas? Superior Drywall & Finishing specializes in high-quality drywall installation, finishing, and repairs. With over 15 years of experience, we deliver exceptional results for residential and commercial clients. Contact us today for a free estimate and let us handle your drywall needs!
Contact Us for High-Quality Drywall Solutions
For expert drywall services in Northwest Arkansas, trust Superior Drywall & Finishing. Whether you need a complete installation, repairs, or a smooth finishing touch, our team is ready to deliver exceptional results. Contact us today to schedule a consultation and bring your drywall project to life.


